How to Fix Common Charger Faults Easily?

Time:2026-10-01 Author:Oliver
0%

A charger that stops working can create immediate frustration: a phone remains at 12%, an adapter feels unusually warm, or a cable works only when bent. These symptoms often point to damaged connectors, overloaded circuits, poor ventilation, or unstable power delivery. Learning How to fix common faults of source chargers easily starts with careful observation, not random replacement. Unplug the charger, inspect the casing, and check for scorch marks, loose pins, cracked insulation, or a burning smell. Safety comes before speed.

Daniel Mercer, a power-electronics reliability specialist with more than fifteen years of field experience, says, “A charger usually gives warning signs before it fails completely; technicians must learn to read them.” His advice reflects practical repair work. Testing the outlet with another device can separate a wall-power problem from a charger fault. Cleaning dust from the connector may restore charging, but moisture and exposed wires require replacement, not improvisation. Never continue using a charger that sparks, overheats quickly, or produces a sharp electrical odor.

Some troubleshooting steps are simple. Others are not. A multimeter can check output voltage, but incorrect settings may damage the tester or create risk. Charging cables also deserve attention because internal breaks can hide beneath intact plastic. I have found that users often blame the adapter first, although the cable or device port is frequently responsible. That assumption deserves reconsideration. This guide will examine common charger faults, practical diagnostic methods, safe cleaning techniques, and clear replacement decisions, helping readers solve minor problems without turning a small inconvenience into a larger electrical hazard.
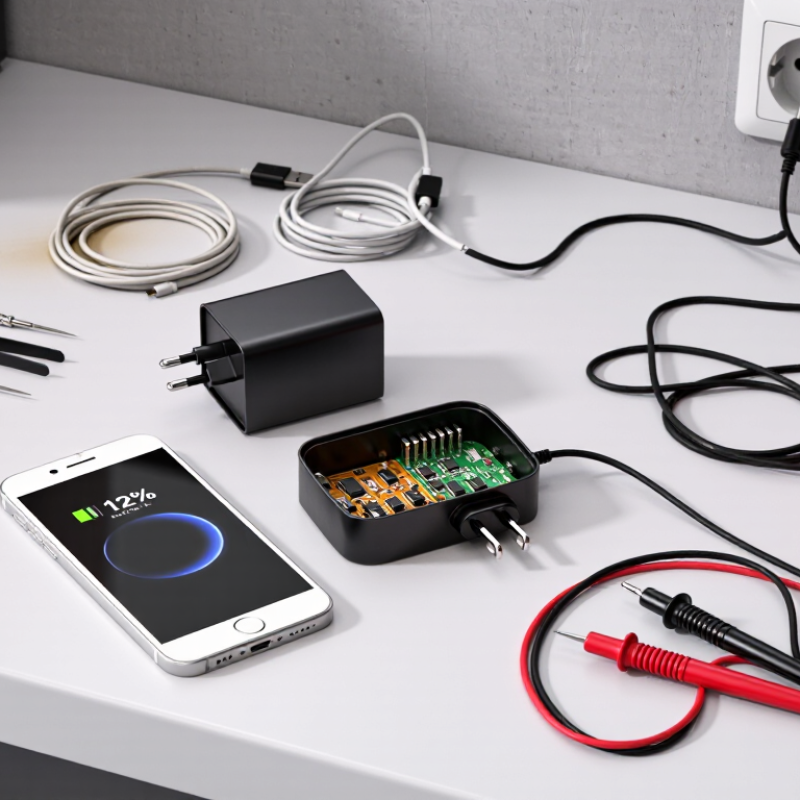
How to Fix Common Charger Faults Easily?

Identify the Charger Fault and Check Basic Safety Conditions

How to Fix Common Charger Faults Easily?

Identify the Charger Fault and Check Basic Safety Conditions

A charger fault often appears as no power, intermittent charging, unusual heat, or a faint buzzing sound. Start by unplugging the charger from the wall and device. Inspect the cable, plug, and charging port under good light. Look for cracked insulation, bent contacts, discoloration, moisture, or loose connections. Even a small split near the plug can expose internal wires.

Test one variable at a time. Try a known working outlet, then check the charger with a compatible device. If charging stops when the cable moves, the cable or connector may be damaged. A slow charge can indicate poor contact, an unsuitable power rating, or a worn battery. Do not rely on appearance alone. Some internal faults leave no visible mark.

Safety comes before repair. Stop using the charger if it smells burnt, sparks, swells, or becomes too hot to touch. Keep it away from water and flammable surfaces. Never open a sealed charger unless you are trained to handle stored electrical energy. I once assumed a loose wall outlet caused the problem, but the real issue was a damaged cable hidden beneath its outer sleeve. That mistake reinforced a useful lesson: simple checks help, but guessing can create danger. A qualified technician should inspect persistent faults.

Inspect the Cable, Plug, Port, and Power Source Step by Step

How to Fix Common Charger Faults Easily?

When a charger stops working, inspect the cable before replacing anything. Unplug it from the power source. Look closely at both ends for splits, bent connectors, loose insulation, or dark marks. Gently bend the cable near each plug. If charging cuts in and out, the internal wires may be damaged. Do not continue using a cable that feels hot or smells burnt.

Next, examine the plug and charging port. Check whether the plug pins look bent or loose. Shine a light into the port and remove visible dust with a dry, soft brush. Never push metal objects inside. A port can appear clean yet hold compacted lint. This is easy to miss. If the connector feels unusually loose, professional inspection is safer than forcing it.

Tips: Test the outlet with another approved device. Try a compatible charger with the same voltage and connector type. Avoid testing several faulty parts at once. That makes the cause harder to identify. If the charger works only at one angle, stop moving it repeatedly. Intermittent contact can worsen. Also, check whether a wall switch is off or a power strip is overloaded. I sometimes blame the charger too quickly; the power source may be the real fault. If you notice smoke, sparks, swelling, or strong heat, disconnect it immediately and seek qualified service.

How to Fix Common Charger Faults Easily?

Inspect the power source, plug, cable, and charging port step by step. The chart shows common nominal USB Power Delivery voltage levels that may appear when a compatible charger, cable, and device negotiate correctly.

Quick check: Confirm the wall outlet works, inspect the plug for damage, test the cable with another compatible device, and remove dust or lint from the charging port. Do not insert metal objects into the port.

Fix Common Charging Problems with Simple Troubleshooting Methods

Charging faults often begin with simple causes. The International Energy Agency’s Global EV Outlook 2024 reports more than 600,000 public charging points were added worldwide in 2023. More equipment means more everyday connection problems. Check the wall socket first. Test another compatible cable and adapter. If charging returns, the original accessory may be failing. Inspect the plug for bent pins, cracks, moisture, or dark marks. Stop using it if you notice heat, smoke, or a burnt smell.

A clean port matters. IEEE Access reviews identify contamination, connector wear, and thermal stress as common charging-failure factors. Switch off the device, then remove visible dust with a soft, dry brush. Never insert metal objects into the port. Confirm that the cable fits firmly, without wobbling. A loose connection can cause slow charging or repeated interruptions. Also check whether the power source supports the device’s required output. A higher-rated charger does not always solve the problem.

Try a full restart after checking the connections. It sounds too simple, but it often clears temporary charging errors. This method is not perfect. Some faults hide inside the adapter or battery. If the charger becomes unusually hot, trips the circuit, or fails with several compatible devices, stop testing it. The U.S. Consumer Product Safety Commission advises replacing damaged electrical products rather than continuing risky use. Record the symptoms, temperature, and tested accessories before seeking qualified repair support.

Test the Charger and Device After Each Repair Attempt

How to Fix Common Charger Faults Easily?

A charger fault often begins with a loose connection, bent contact, or damaged cable. Unplug the charger before inspecting it. Check the plug, cable jacket, connector, and device port under bright light. Look for heat marks, cracked insulation, dust, or a metallic smell. Do not open sealed power units unless you are trained to handle mains electricity.

Test the charger and device after each repair attempt. This step prevents guesswork from becoming a safety risk. Use a certified power meter to check voltage and current without exceeding the device’s rated input. Test with a known-good cable, then test the repaired cable separately. If charging stops when the cable moves, the fault may remain. I once treated intermittent charging as a dirty port, but the cable strain relief was actually broken. Small mistakes happen.

The Global E-waste Monitor 2024 reported 62 million tonnes of electronic waste in 2022, while only 22.3% was formally collected and recycled. Repairing a safe charger can reduce unnecessary disposal, but replacement is wiser when insulation is burned or the casing is cracked. A European Commission impact assessment estimated that common charging standards could prevent about 11,000 tonnes of waste each year. After every repair, check charging stability for several minutes and feel for unusual heat. Stop immediately if the charger sparks, smells sharp, or becomes hot enough to avoid touching.

How to Fix Common Charger Faults Easily? — Test the Charger and Device After Each Repair Attempt
Common Fault Likely Cause Initial Test Repair or Corrective Action Test After Each Attempt Safe Result to Confirm Stop-Use Condition
No charging output Damaged cable, failed connector, blown internal component, or incompatible power source. Try a known-good cable and a different compatible outlet. Inspect the plug and connector for cracks, bent contacts, or contamination. Replace the damaged cable or connector. Do not bypass protective components or open a sealed mains charger. Measure the charger output with a suitable USB power meter or connect a known-good device for 1–2 minutes. The output is present and matches the charger’s printed rating within approximately ±5% under a light load. Burn marks, exposed conductors, melted plastic, sparks, or a persistent zero-output condition.
Intermittent charging Loose connector, broken cable conductor, worn socket, or poor contact caused by dirt. Gently move the cable near each connector while monitoring the charging indicator. Do not force the device socket. Clean external contacts with appropriate electronics-safe materials and replace a damaged cable. A loose device socket requires qualified service. Repeat the connection test at several angles without applying excessive pressure, then charge for at least 10 minutes. Charging remains continuous and the connector does not become unusually warm. Charging starts and stops when the cable is touched, or the socket feels loose or mechanically unstable.
Charger becomes unusually hot Overload, blocked ventilation, damaged circuitry, poor electrical contact, or operation in a hot environment. Disconnect the charger and allow it to cool. Check its rated output, ventilation, cable condition, and load requirements. Remove obstructions and replace damaged accessories. Do not repair mains-side circuitry without suitable training and isolation equipment. Operate the charger with the intended device for 15–30 minutes on a clear, hard surface and check for abnormal odor or heat buildup. It remains warm but stable, with no odor, deformation, noise, or interruption. Exact temperature limits depend on the design. Too hot to touch briefly, swelling, smoke, chemical odor, buzzing, discoloration, or repeated thermal shutdown.
Charging is slower than expected Low-power adapter, unsuitable cable, high device usage, poor connection, high battery temperature, or battery aging. Check the charger and device ratings. Compare charging with the screen off and with a known-good compatible cable. Use a charger and cable that meet the device’s required voltage, current, and charging-protocol specifications. Record the battery percentage before and after 30 minutes under the same conditions, while avoiding intensive device use. The charging rate improves and remains stable without excessive heat or repeated connection warnings. The device reports incompatible power, the battery swells, or charging remains abnormal with multiple known-good accessories.
Connector or cable damage Repeated bending, crushing, pulling, moisture exposure, or worn strain relief. Inspect the full cable length, plug housing, strain relief, and contacts under good lighting. Replace the complete cable when insulation is split, conductors are visible, pins are bent, or the connector housing is loose. Perform a visual inspection, then test charging and data functions if the cable is designed to support both. No exposed metal, loose housing, excessive bending at the strain relief, or charging interruption. Exposed wires, cracked insulation near a power connector, corrosion, liquid residue, or visible arcing damage.
Device does not recognize the charger Dirty port, unsupported charging protocol, damaged device socket, software issue, or insufficient power negotiation. Restart the device, inspect the port without inserting metal objects, and test another compatible charger and cable. Remove loose lint using a nonconductive method and replace incompatible accessories. Seek qualified service for port damage. Reconnect the device after cleaning or replacing one component at a time, then confirm the charging symbol and battery increase. The device recognizes the charger consistently and the battery percentage rises during a 10-minute test. Liquid is present, contacts are bent, the port is charred, or the device becomes hot immediately after connection.
Output voltage is unstable Faulty adapter regulation, damaged cable, overload, or unsuitable measurement method. Use a meter rated for the connector and voltage range. Test with no load and then with a compatible load. Replace the charger or cable if readings fluctuate beyond the specified range. Do not adjust a sealed charger internally. Repeat the measurement after reconnecting the cable and after a short operating period. Compare readings with the printed output rating. Voltage remains stable and within the charger’s specified tolerance under normal load. Large voltage swings, unexpected voltage on a non-powered state, sparks, audible clicking, or device malfunction.
Charger causes a warning or electrical sensation Grounding problem, insulation failure, damaged plug, unsuitable outlet, or leakage current from a faulty adapter. Disconnect immediately. Inspect the plug, outlet, and charger for damage, moisture, discoloration, or looseness. Replace the charger and have the outlet checked by a qualified electrician if the sensation or warning repeats. Only resume testing with an undamaged, approved replacement charger and a known-safe outlet. No warning, tingling, odor, noise, or visible damage occurs during a supervised short test. Any electric shock, tingling sensation, smoke, sparks, damaged mains plug, or repeated circuit-breaker trips.
Testing rule: Change only one component or adjustment at a time, disconnect power before inspecting or cleaning, and compare every measurement with the voltage and current ratings printed on the charger and device. Mains-powered charger repairs should be performed only by a qualified technician.

Know When to Replace the Charger or Seek Professional Assistance

A charger fault is not always a charger failure. I usually begin with simple checks: another wall outlet, a clean connector, and a firm cable connection. If charging stops intermittently, watch the indicator while gently moving the plug. Stop using it immediately if charging cuts in and out. A warm adapter may be normal, but a hot casing, burnt smell, buzzing, or discoloration is not. Never cover it with clothing or place it on a soft bed. These details can reveal trouble early.

Replacement makes more sense when the cable insulation is split, pins are bent, or the casing has opened. Do not tape exposed wires and continue charging. That is a poor repair, even if the device still works. Choose a compatible replacement with the correct voltage, current, connector, and safety markings. Check the device manual or original specifications carefully. A cheaper match can still be electrically wrong. I once treated a loose connection as a battery problem, which delayed the real fix.

Seek professional assistance when the charger stays hot, produces sparks, or fails with another suitable charger. Internal testing requires proper meters, insulated tools, and practical training. Do not open a sealed adapter on a kitchen table. Stored electrical energy may remain after unplugging. A qualified technician can test output stability, grounding, and connector damage without guessing. If liquid entered the charger, replace it or request an inspection, even after it appears dry. Waiting for complete failure is not a reliable safety strategy.

FAQS

What should I inspect first when a charger stops working?

Unplug it first. Examine the cable for splits, loose insulation, bent connectors, or dark marks. Gently bend each end. If charging cuts in and out, hidden wire damage may exist.

How can I tell whether the wall outlet is causing the problem?

Test the outlet with another suitable device. Check whether a wall switch is off. Also inspect the power strip for overloading. I sometimes blame the charger too quickly.

What signs show that a cable or plug should be replaced?

Replace it when insulation is split, pins are bent, or the casing has opened. Do not tape exposed wires. That repair is unreliable.

How should I clean a charging port safely?

Switch off the device first. Use a soft, dry brush to remove visible dust or lint. Never insert metal objects. Compact lint can be hard to notice.

Why does charging stop when the cable moves?

The connector may be loose, or internal wires may be damaged. Stop moving it repeatedly. Intermittent contact can worsen. A professional inspection is safer.

What temperature or smell indicates a dangerous charger fault?

Unusual heat, smoke, sparks, buzzing, discoloration, or a burnt smell requires immediate disconnection. Do not cover the charger with clothing or place it on a soft bed. Heat needs space.

How can I test whether the charger or device is faulty?

Test one variable at a time. Try another suitable outlet, cable, or adapter with matching specifications. If the charger fails with several compatible devices, stop testing it. Record the symptoms first.

When should I seek professional assistance?

Seek qualified help when the charger stays hot, sparks, trips a circuit, or fails repeatedly. Do not open a sealed adapter on a kitchen table. Internal energy may remain after unplugging.

How should I choose a replacement charger?

Match the required voltage, current, connector, and safety markings. Check the device specifications carefully. A cheaper match may still be electrically wrong. Compatibility is not always obvious.

Conclusion

Learning how to fix common faults of source chargers easily starts with identifying the problem and confirming basic safety conditions. Unplug the charger before inspecting it, and look for heat, burning smells, exposed wires, loose connections, or unusual sounds. Check the cable, plug, charging port, wall socket, and power source step by step. Cleaning dust carefully, reconnecting loose parts, trying a different safe outlet, or replacing a damaged cable may resolve common charging problems. Avoid using any charger that shows serious physical damage or signs of overheating.

After each troubleshooting attempt, test the charger with a compatible device and observe whether charging is stable and safe. If the charger remains unreliable, becomes excessively hot, or causes repeated interruptions, stop using it and replace it with a suitable certified model. When internal damage is suspected or the issue cannot be identified safely, seek help from a qualified professional rather than attempting risky repairs.

Oliver

Oliver

Oliver is a seasoned marketing professional with a wealth of expertise in driving brand awareness and engagement. With a deep understanding of our company's product offerings, he consistently delivers high-quality content that enriches our professional blog. His insights not only shed light on......